
I already knew a bout Home Assistant but in the summer of 2023 I finally got to experience it for myself. After a generous donation of hardware from my uncle ^^
Thanks Ton!
I got the basics things I wanted to have available. I will make a next post describing my journey from installing to getting everything up and running later. First I want to talk about my dashboard.
This is not a guide to setting up Home Assistant, plenty of those available. The scope of this post is sharing dashboard setup.
Getting my dashboard set up was not very difficult but it did require a few tries and a lot of figuring things out through multiple guides. To pay it forward I’m going to bundle things here.
The dashboard consists of 4 vertical stacks. One of the first things I learned was that it was difficult to control the exact location of what HA calls ‘cards’ on a dashboard. With a vertical stack card I can do exactly that as it group multiple other cards. The result is my dashboard shown below. The dashboard is not perfect yet or finished but for now I have I have the minimum setup that I wanted. Which are:
- Power usage and production monitoring
- Required a P1 cable in my case
- Central heating control
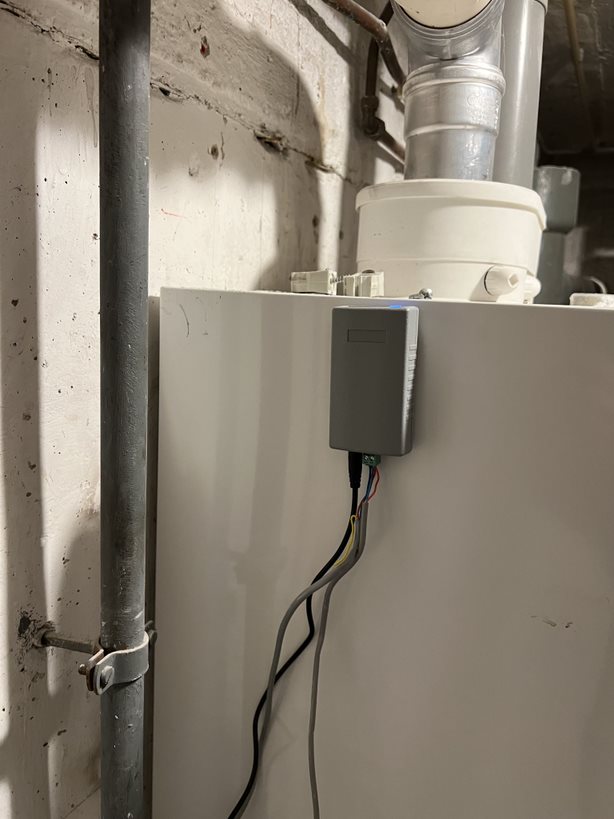
- Required a EMS-ESP in my case, this differs depending on the heater manufacturer
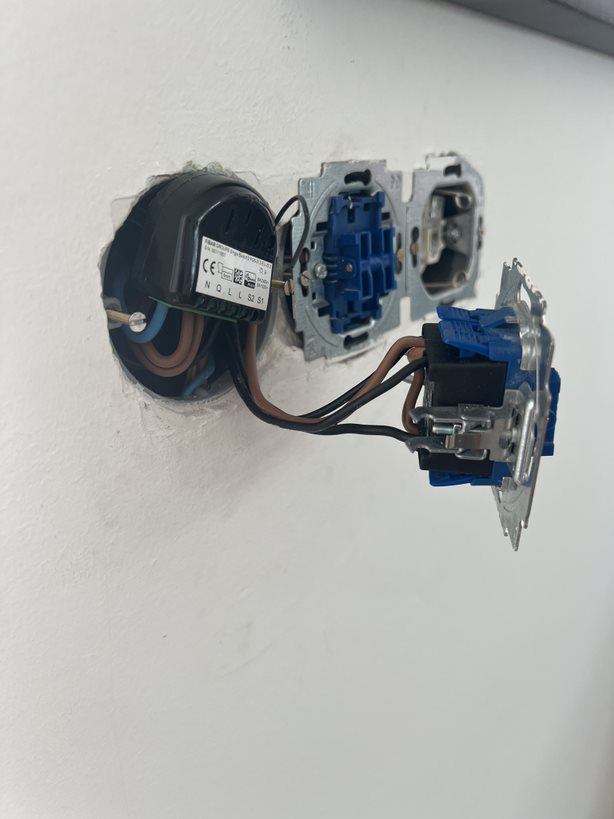
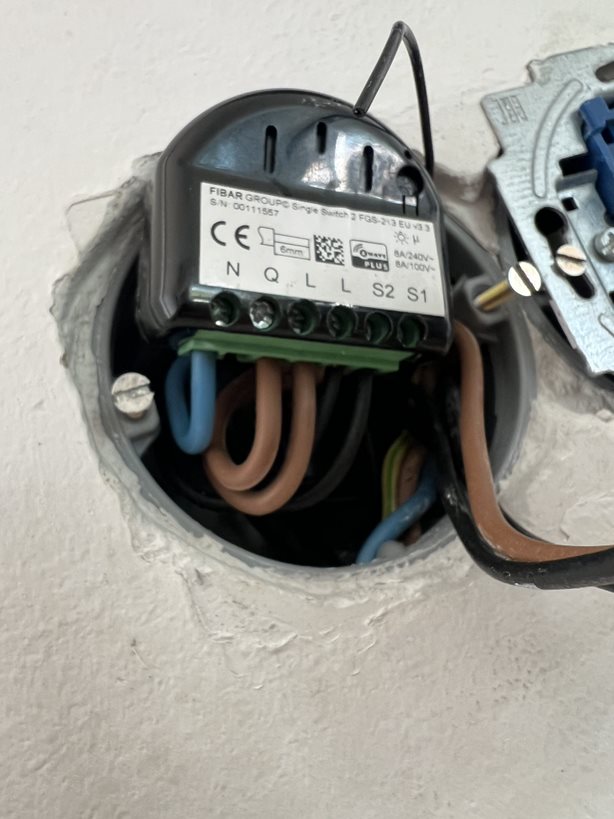
- Link my Fibaro smoke detectors
- Required a Z-Wave adapter (my uncle kindly gave me his Aeotec Z-Wave Gen5 USB stick)
- Insight in the temperatures throughout the house and outside
- I used Philips Hue motion detectors, Fibaro smoke detectors and Aqara H&T sensors
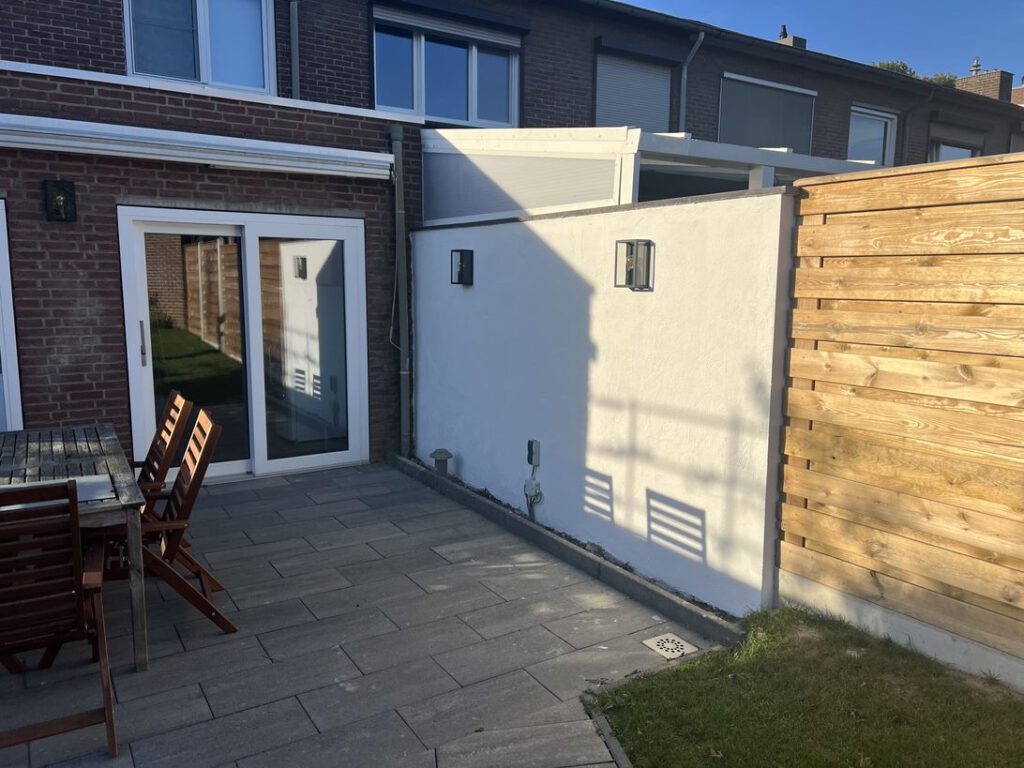
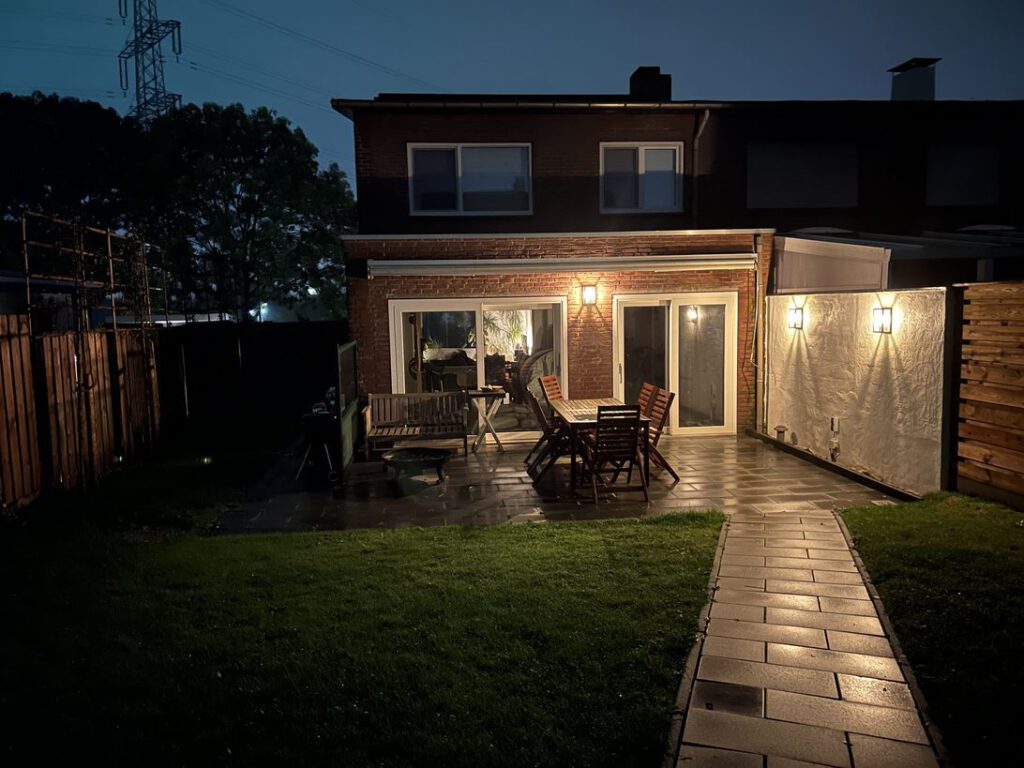
- Control my Philips Hue lights
- Weather forecasting
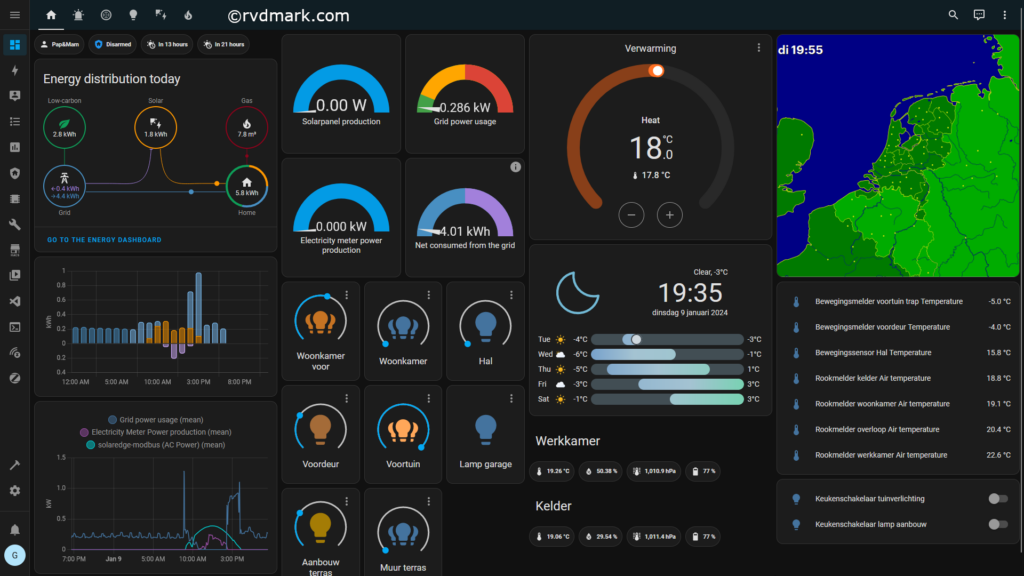
In the first column you can see two cards that I copied from the energy dashboard built into Home Assistant. At first this was difficult to get done because I was unable to view the card-code on the energy dashboard. I did find this site from HA but at first I didn’t know how to get it working. In the end I figured out I just needed to add a random new card, delete all it’s code using the code editor and then add the code mentioned on the site mentioned before.
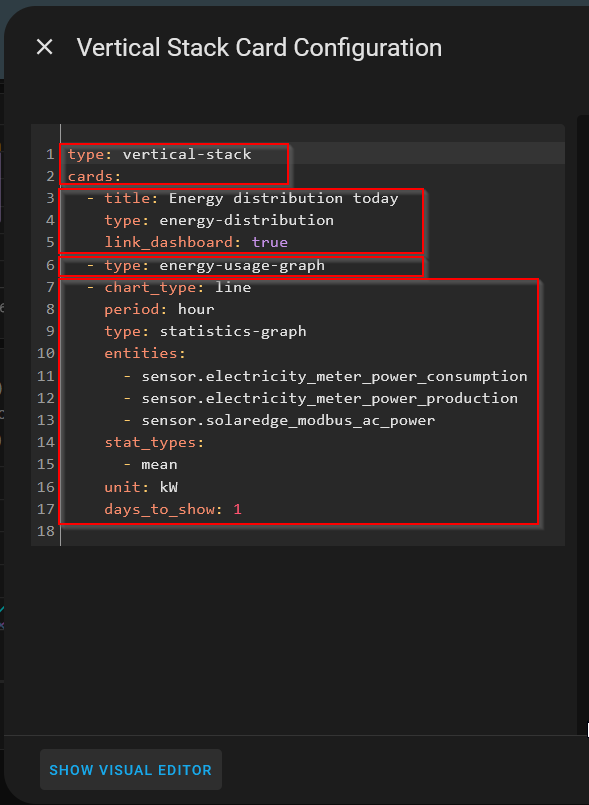
The last card in the first vertical stack is a card showing my power usage, power production measured by my power meter and the solar power produced by my solar panels.
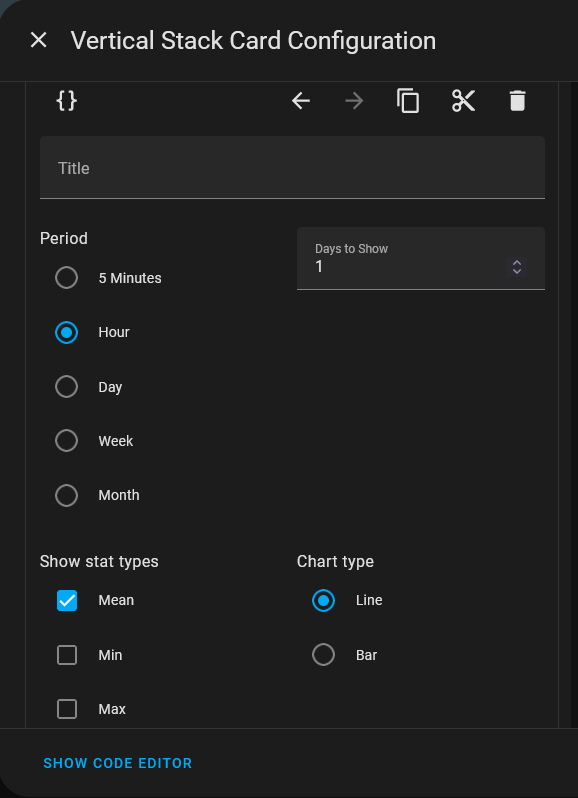
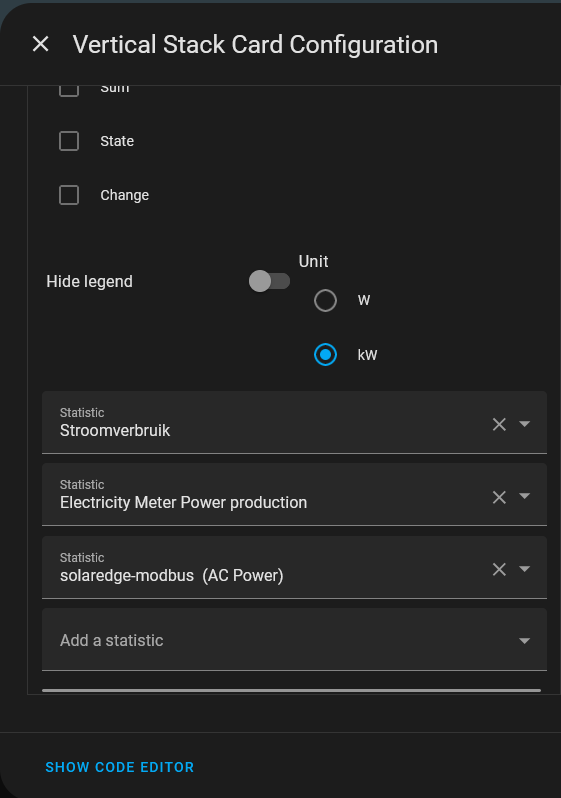
To create that card I added the Statistics card to the vertical stack card and selected the sensors I wanted to have displayed. The below screenshots also show the further settings and also the code for the entire first vertical stack.
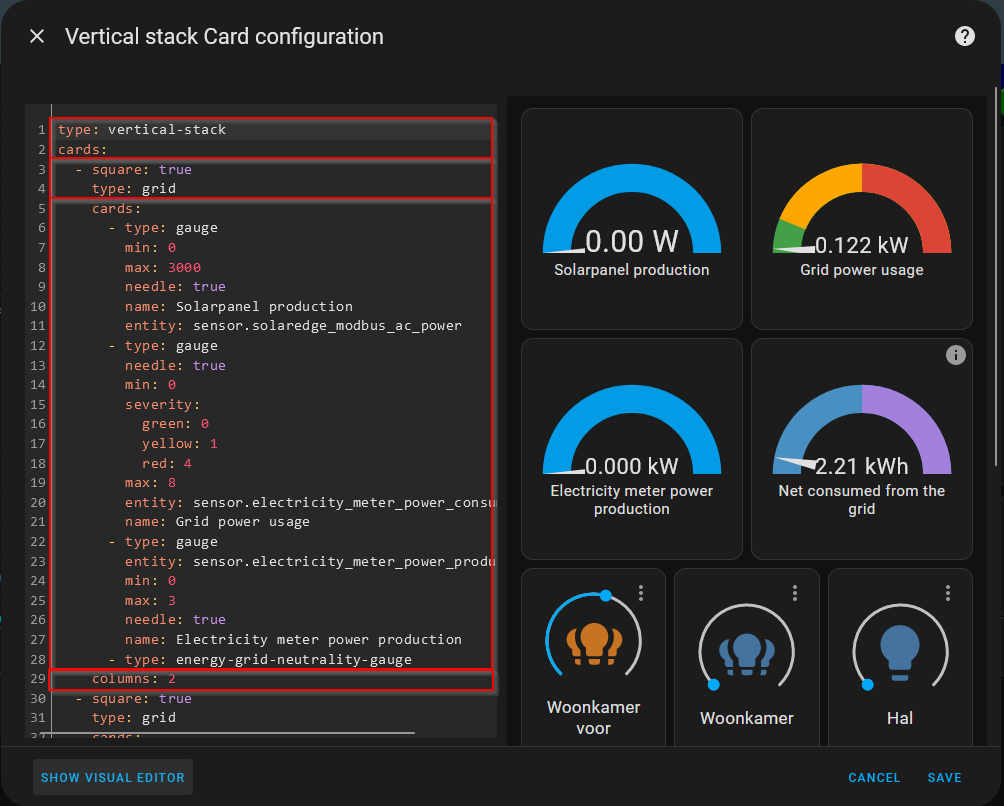
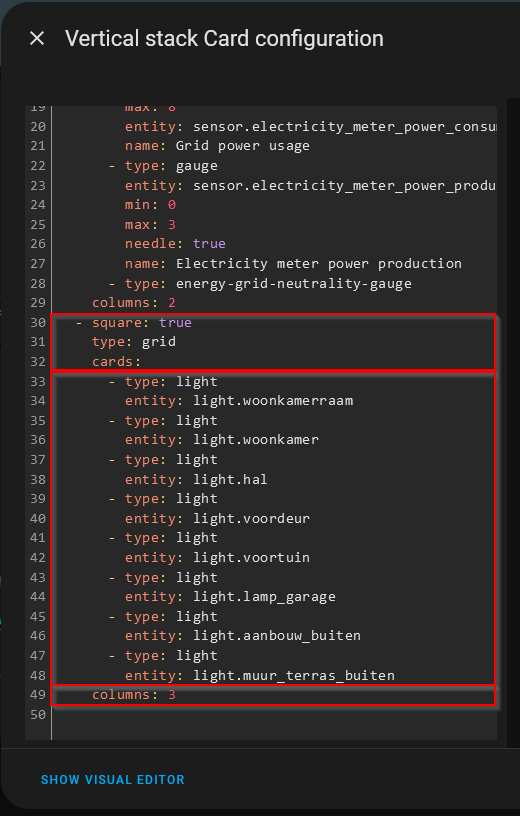
The second vertical stack is dedicated to power production, power consumption and my Philips Hue lights.
In integrated two grid cards in the vertical stack so I could neatly group my gauges and my lights. The “Net consumed from the grid” card is part of the gauges on the Energy Dashboard.
I’m a Dutch guy so you can see that the labels accompanying the light icons are in Dutch. These labels are imported from my Philips Hue bridge. I integrated that into Home Assistant and also the lights are in Dutch in the Hue app for the partner approval factor.
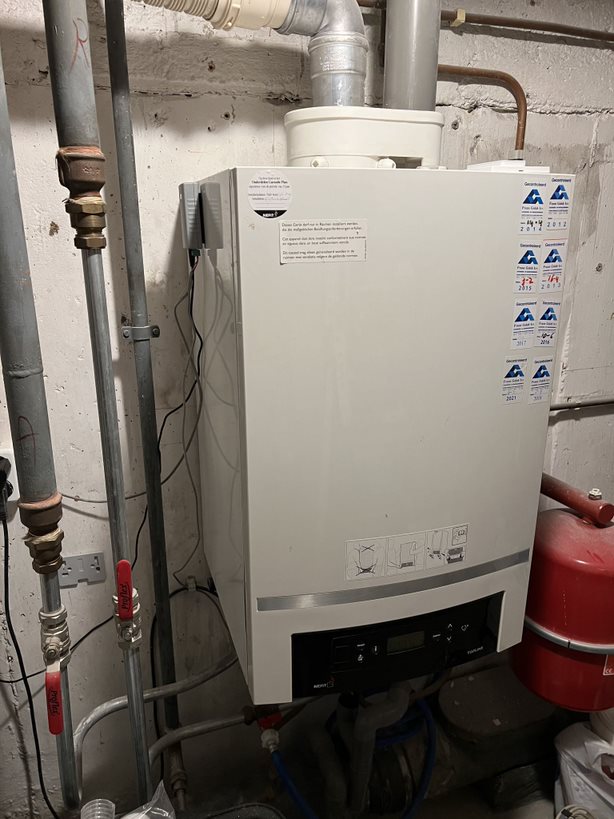
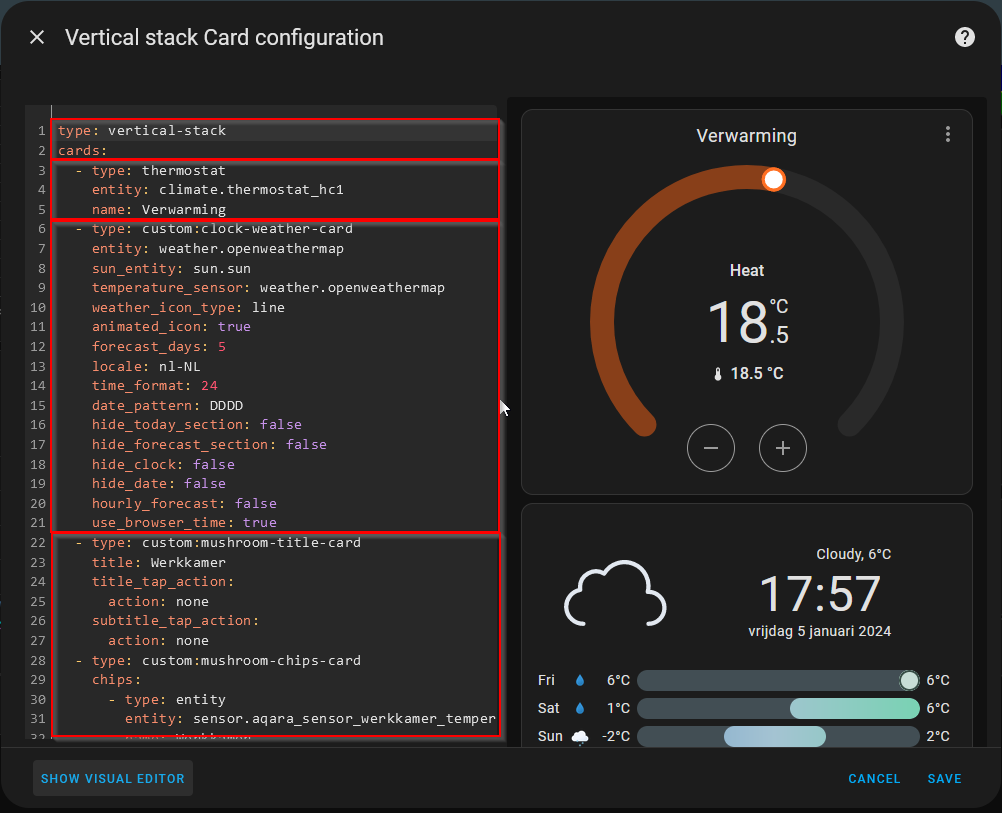
In the third vertical stack my heater control card, I bought a EMS-ESP unit from BBQ Kees which allows Home Assistant to “talk” to my Nefit central heating system. It connected on the line used by the thermostat, the thermostat can work normally but the EMS-ESP can send EMS protocol messages to change the temperature. But it also monitors the bus allowing me to see all the juice details, more later.
Next is the Clock Weather Card, available via HACS. How to install HACS into Home Assistant is also out of the scope for this article. Very well documented online.
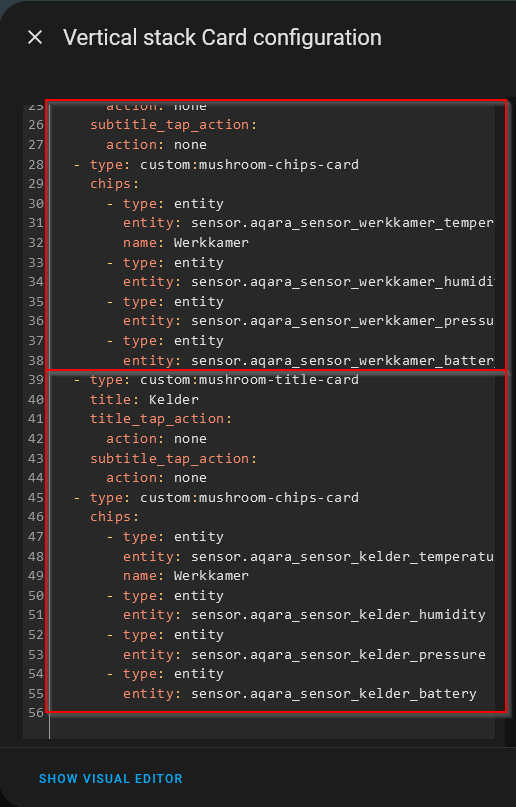
And last up in the third stack I used mushroom cards combined with two title cards to displays the values for the Aqara sensors in my study and my basement. The monitor temperature, humidity, and atmospheric pressure.
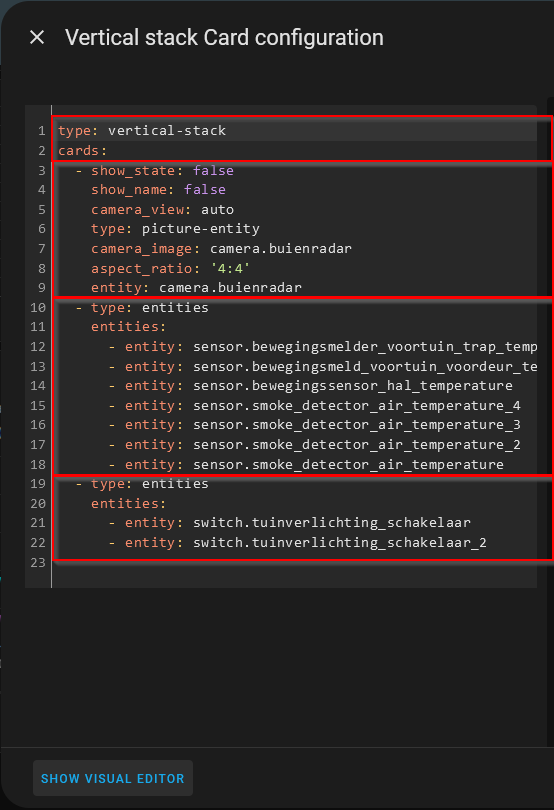
In the fourth vertical stack is a radar view from Buienradar for some live meteorological insight.
This is followed up by a entities card showing temperature readings from my Fibaro smoke detectors and Philips Hue motion sensors.
Then I have a card showing the status of a Fibaro switch which monitors the physical state of two switches in my kitchen. Used to turn on the Hue lights in my backyard, if the switch is turned on then an automation in Home Assistant instructs the accompanying lights to turn on.
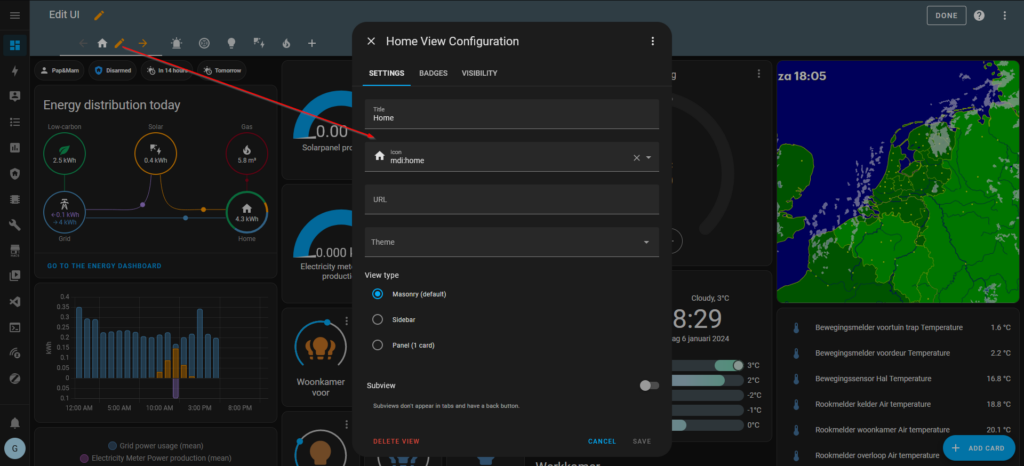
Then we get to the last bit of my dashboard, icons in stead of text on the title cards.
The solution to that was easy, by default no icon is selected and the name of the view is used. However if you used an icon that take priority.
In the future I might make the dashboard more polished. I’m working on it constantly but as it stand right now I’m happy with it as it gives me the insight and control I wanted.
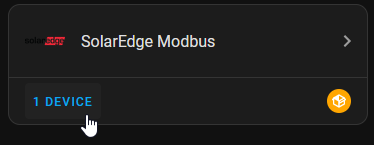
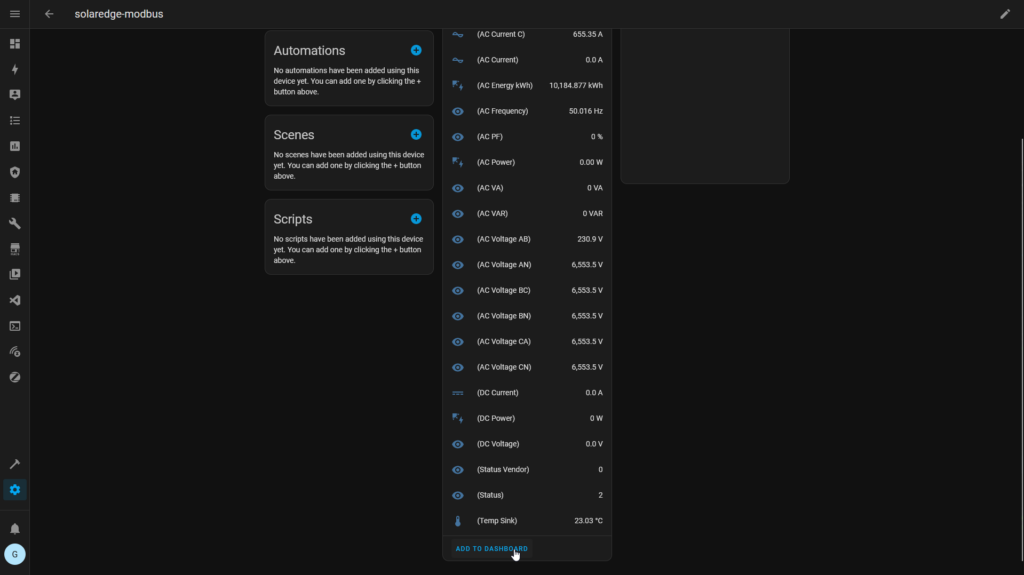
The other views contain more detailed views of the different elements on my dashboard. Like my details about my SolarEdge inverter, Nefit central heating, etc. That way I can see more details quickly whenever I want. The SolarEdge and Nefit central heating where really easy, just add views from entities directly to a dashboard view from the entities list in HA.
To add entities to a dashboard one quick way is by going to settings -> Devices & Services -> Click the device or entities list and usually you’ll see views on the next page that you can add to your main dashboard or other view.
Code
First off, I do not offer any support. I want to help people hit the ground running but there are to many unique cases. Home Assistant requires, in my opinion, a level of willingness to tinker with things.
My intention with sharing the code is to get people up and running quickly. If you copy a section of code you can then also use the visual editor to change things.
One import thing to take note of are the entities, some entities are always the same but things like my light and temperature sensor entities are unique to my setup because of the names I gave the devices/entities.
First stack:
type: vertical-stack
cards:
  - type: custom:mushroom-chips-card
    chips:
      - type: entity
        entity: person.gitm
      - type: alarm-control-panel
        entity: alarm_control_panel.alarmo
      - type: entity
        entity: sensor.sun_next_rising
      - type: entity
        entity: sensor.sun_next_setting
  - title: Energy distribution today
    type: energy-distribution
    link_dashboard: true
  - type: energy-usage-graph
  - chart_type: line
    period: 5minute
    type: statistics-graph
    entities:
      - sensor.electricity_meter_power_consumption
      - sensor.electricity_meter_power_production
      - sensor.solaredge_modbus_ac_power
    stat_types:
      - mean
    unit: kW
    days_to_show: 1


Second stack:
type: vertical-stack
cards:
- square: true
type: grid
cards:
- type: gauge
min: 0
max: 3000
needle: true
name: Solarpanel production
entity: sensor.solaredge_modbus_ac_power
- type: gauge
needle: true
min: 0
severity:
green: 0
yellow: 1
red: 4
max: 8
entity: sensor.electricity_meter_power_consumption
name: Grid power usage
- type: gauge
entity: sensor.electricity_meter_power_production
min: 0
max: 3
needle: true
name: Electricity meter power production
- type: energy-grid-neutrality-gauge
columns: 2
- square: true
type: grid
cards:
- type: light
entity: light.woonkamerraam
- type: light
entity: light.woonkamer
- type: light
entity: light.hal
- type: light
entity: light.voordeur
- type: light
entity: light.voortuin
- type: light
entity: light.lamp_garage
- type: light
entity: light.aanbouw_buiten
- type: light
entity: light.muur_terras_buiten
columns: 3
Third stack:
type: vertical-stack
cards:
  - type: thermostat
    entity: climate.thermostat_hc1
    name: Verwarming
  - type: custom:clock-weather-card
    entity: weather.openweathermap
    sun_entity: sun.sun
    temperature_sensor: weather.openweathermap
    weather_icon_type: line
    animated_icon: true
    forecast_days: 5
    locale: nl-NL
    time_format: 24
    date_pattern: DDDD
    hide_today_section: false
    hide_forecast_section: false
    hide_clock: false
    hide_date: false
    hourly_forecast: false
    use_browser_time: true
  - type: custom:mushroom-title-card
    title: Werkkamer
    title_tap_action:
      action: none
    subtitle_tap_action:
      action: none
  - type: custom:mushroom-chips-card
    chips:
      - type: entity
        entity: sensor.aqara_sensor_werkkamer_temperature
        name: Werkkamer
      - type: entity
        entity: sensor.aqara_sensor_werkkamer_humidity
      - type: entity
        entity: sensor.aqara_sensor_werkkamer_pressure
      - type: entity
        entity: sensor.aqara_sensor_werkkamer_battery
  - type: custom:mushroom-title-card
    title: Kelder
    title_tap_action:
      action: none
    subtitle_tap_action:
      action: none
  - type: custom:mushroom-chips-card
    chips:
      - type: entity
        entity: sensor.aqara_sensor_kelder_temperature
        name: Werkkamer
      - type: entity
        entity: sensor.aqara_sensor_kelder_humidity
      - type: entity
        entity: sensor.aqara_sensor_kelder_pressure
      - type: entity
        entity: sensor.aqara_sensor_kelder_battery
Fourth stack:
type: vertical-stack
cards:
  - show_state: false
    show_name: false
    camera_view: auto
    type: picture-entity
    camera_image: camera.buienradar
    aspect_ratio: '4:4'
    entity: camera.buienradar
  - type: entities
    entities:
      - entity: sensor.bewegingsmelder_voortuin_trap_temperature
      - entity: sensor.bewegingsmeld_voortuin_voordeur_temperature
      - entity: sensor.bewegingssensor_hal_temperature
      - entity: sensor.smoke_detector_air_temperature_4
      - entity: sensor.smoke_detector_air_temperature_3
      - entity: sensor.smoke_detector_air_temperature_2
      - entity: sensor.smoke_detector_air_temperature
  - type: entities
    entities:
      - entity: switch.tuinverlichting_schakelaar
      - entity: switch.tuinverlichting_schakelaar_2
One Reply to “Home Assistant – Dashboard setup”